Scheduled Emails Tab
Access the Scheduled Meeting
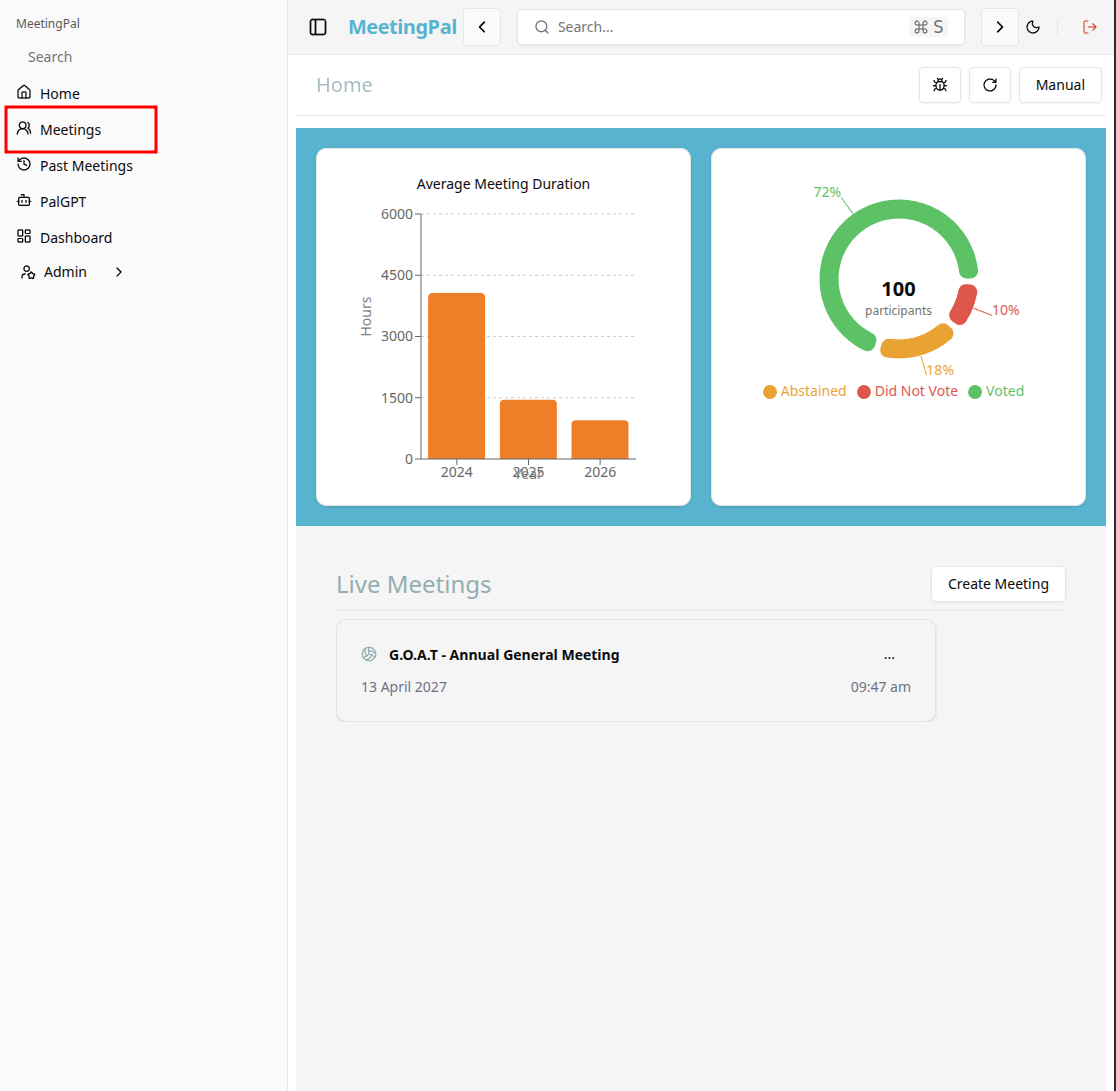
On the MeetingPal Home Page, locate the left-hand menu. Select Meetings.
Start editing the meeting
In the meetings page ,you will see all your meetings and the meetings that you are scheduled to attend.
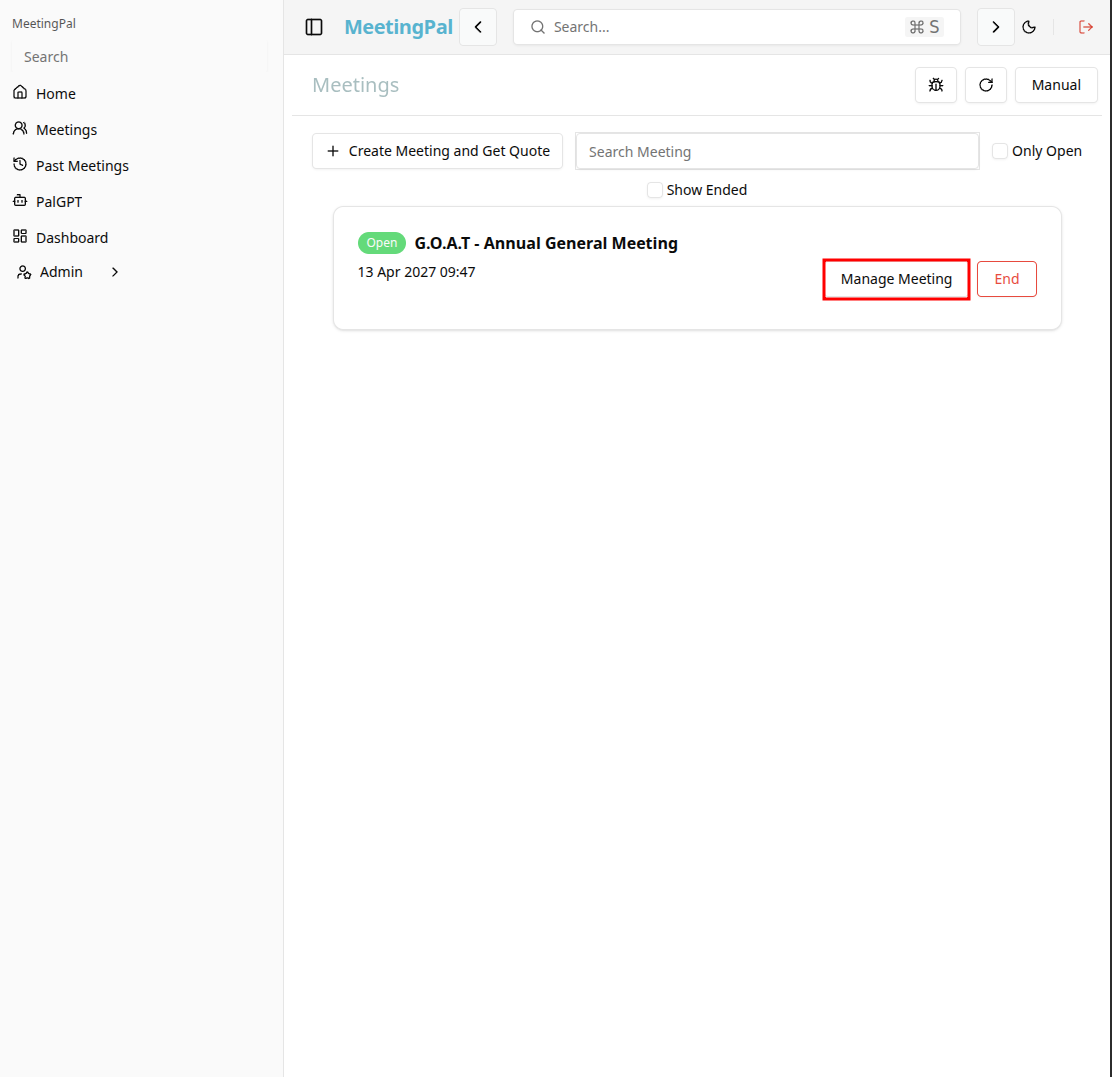
Click on the 'Manage Meeting' button to begin editing the selected meeting.
Open the Scheduled Emails Tab
In the selected meeting’s dropdown menu, click Scheduled Emails.
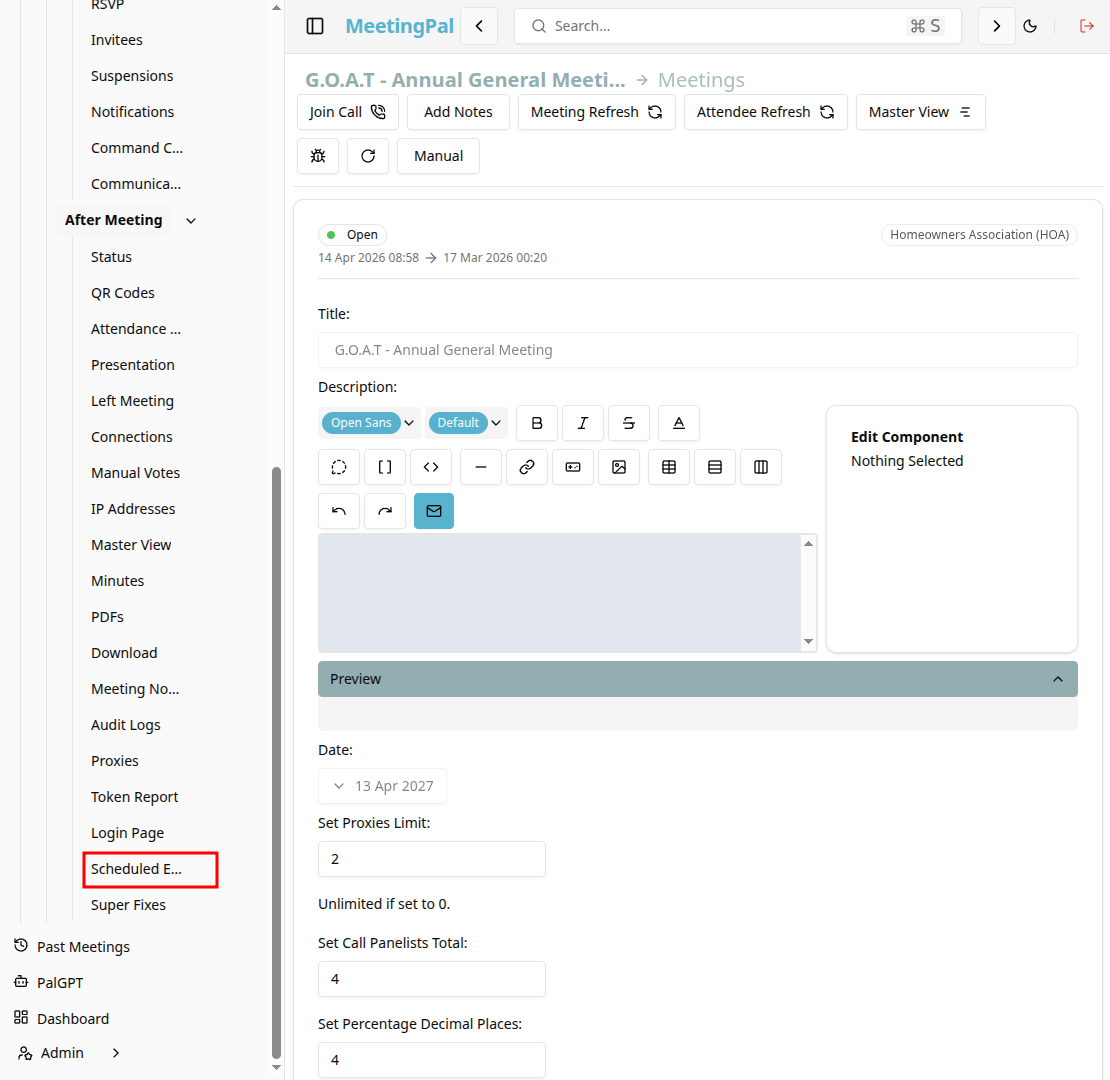
The Scheduled Emails page will open.
Understanding the Scheduled Emails Page
The Scheduled Emails page allows you to create and manage emails that will be sent automatically at a future date and time.
From this page, you can:
- Review the delivery schedule.
- See the status of an sent/scheduled email
Monitor Scheduled Email Status
Each scheduled email may display a status such as:
- Scheduled.
- Sent.
- Paused.
- Cancelled.
- Failed.
Use this information to confirm that emails are queued correctly.
Best Practices
Review recipient groups carefully.
Monitor the status after the scheduled send time.
Important Notes
Scheduled emails are sent automatically based on the configured date and time.
Editing the Invite Email template after scheduling may not affect already scheduled messages, depending on your configuration.
Ensure recipient email addresses are accurate before scheduling.